Weebly is one of the most popular website builders. It makes it possible for anyone to have a beautiful website without spending a fortune and hiring multiple resources for its development and maintenance. When it comes to small business owners on a tight budget, this might be a great approach to grow their company without significantly increasing operational costs.
With a website builder, it’s like playing with a stack of Legos – except that it’s a lot more fun. You may be wondering how to use Weebly to build an online business, store, or blog.
With the help of Weebly tutorials, even if you have no programming or coding expertise, you can easily build a website. Here is how you can create a great website using Weebly.
Start using Weebly for free here!
Step 1: Sign Up
Select the “Sign Up” option on Weebly.com. On the next page that appears after that, you need to fill up your personal information, such as your full name, email address, password, and city. After filling in all the required information, click the “Sign up for free” button.
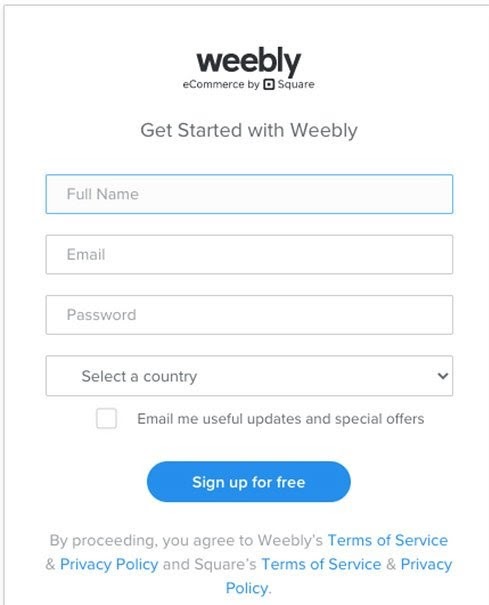
Finally, you have a Weebly account now. Since Weebly includes a free plan, there’s no need to upgrade to the paid plan immediately.
Step 2: Choose a Theme
After registering, you’ll need to choose a theme. More than 50 modern Weebly templates are available for your unique business needs, making it easier than ever to find the perfect fit.
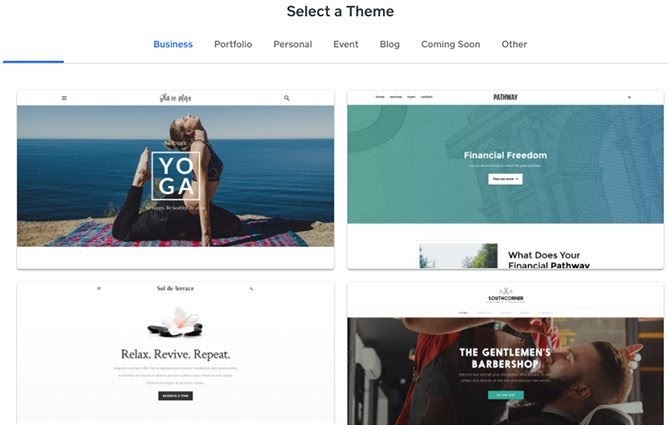
The good news is that, in contrast to many other website builders, Weebly provides each theme for free. Consider the following options:
- Business- templates for barbershops, yoga studios, financial services, and inventions, among others.
- Portfolio – from minimalist to vibrant themes
- Personal – a range of themes to suit a range of personalities.
- Event – promote significant events through the use of a range of various themes.
- Create a blog – write about travel, a healthy lifestyle, music, food, or anything that interests you.
- Other Industry- Tailored Weebly themes can meet the exact requirements of a particular business. For instance, if you choose an online store, it includes a “Shop” page, a call-to-action button, featured products, and a section for special specials. If you select a suitable theme for your sector, you will only need to change the content and add images.
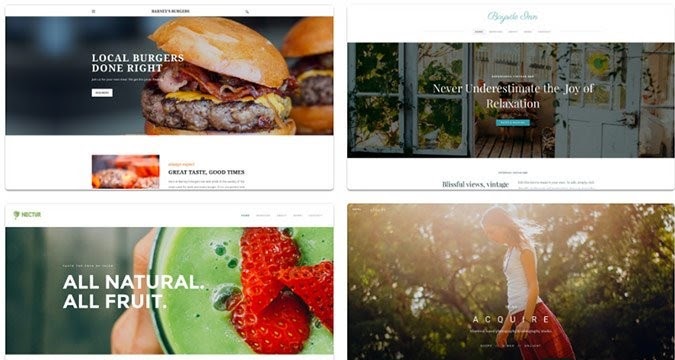
If you’re having difficulty choosing a theme, remember that Weebly allows you to change it even after editing a sentence. So you may test to see which one works best for you or your company.
Step 3: Domain Name Registration, Selection, and Transfer
After examining the most visually appealing designs and deciding on the one that best meets your demands, it’s time to create or transfer (if you already have one) a domain name. Alternatively, you can buy a domain name on NameCheap.
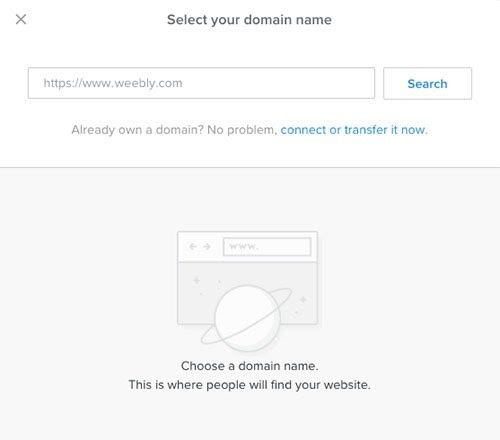
Domain names are what your website uses to identify itself online. The URL reflects it. It should be distinctive, brandable, and properly identify your website. Here are some tips from Weebly for a good domain name:
- Make it distinctive.
- Keep it short.
- Make it simple to understand.
- Ensure that it is pronounceable.
If your intended domain name is not available, Weebly recommends adding a “prefix, suffix, or other TLD extension.”
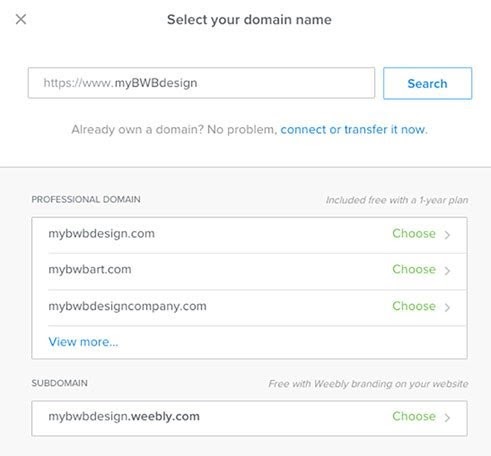
You can instantly link or transfer a domain name. If not, you can choose a domain name from Weebly’s list.
You can also continue editing by selecting a free Weebly subdomain. After that, once you’ve determined it, you’ll be able to choose a plan to go along with your new domain name.
Thus, after you’ve picked a domain name, it’s time to move on to the most exciting part of this Weebly tutorial: editing.
Step 4: Begin Editing
When changing the website, don’t fear to show your creativity and experiment with various aspects to produce the most streamlined and efficient site possible.
You’ll discover “Individual Elements” on the left, which you may edit and drag and drop onto your website. It is how it appears:
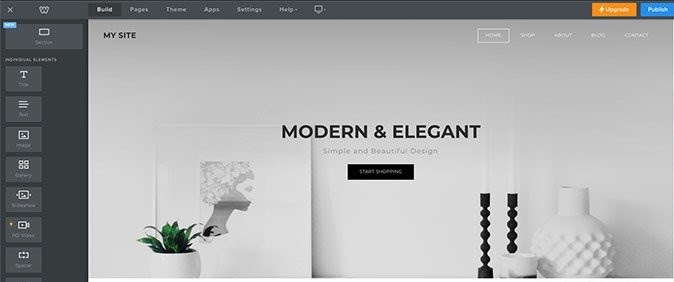
Let’s dive further and learn how to use Weebly.
Background Editing
To begin customizing a website, start by editing the background. Change the background image, delete pictures, choose a scrolling effect, and use more advanced features to save your changes and arrange the content as needed by clicking on the background image and making the necessary changes.

Text Editing
To edit a text, click on each text box and input whatever you want. Change the names, subtitles, and product descriptions of your content to create something unique.

Individual Elements Adding/Removing
Because Weebly is a drag-and-drop editor, you can begin by selecting individual pieces from the list on the left and drag them to the desired location. Almost all elements are free to use; however, those with a bolt symbol on the upper left side of the box are exclusively available to paid members.
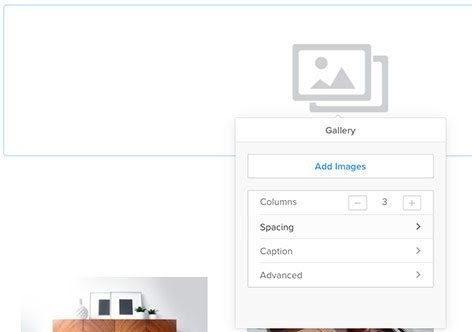
Choose the “Gallery” element, drag it to your preferred spot, and begin editing:
- Edit the spacing
- Change the number of columns
- Add a photo
- Add a caption
More advanced options, such as border and image ratio, are available. By clicking the “Delete” button in the upper right corner of an element, you can delete it from your website immediately if you change your mind.

Page Editing and Adding
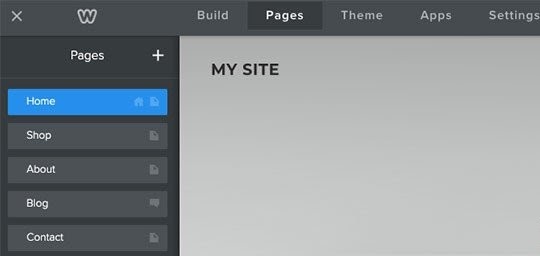
If you wish to edit or add pages to your website, the “Pages” part of the menu strip is where you’ll find all the options. You can edit existing pages on your site by changing their visibility on the site, header, name, and including SEO features.
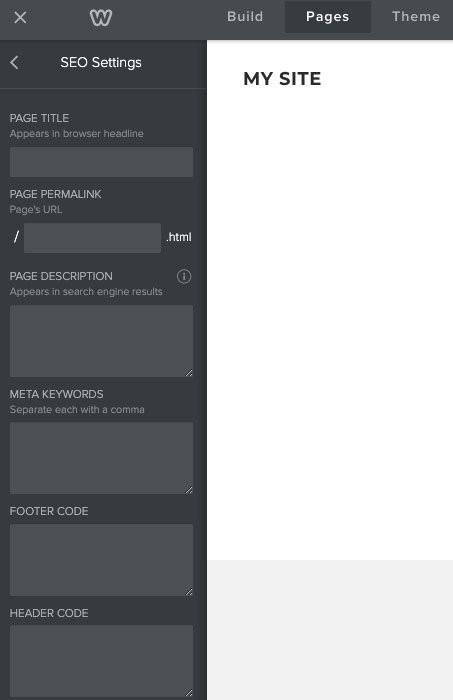
The SEO section is critical for every website. You should provide as much information as possible, including the page title, description, and meta keywords. All of these criteria, and many more, contribute to Google’s ranking algorithm.
You can learn more about SEO in our SEO beginners’ guide.
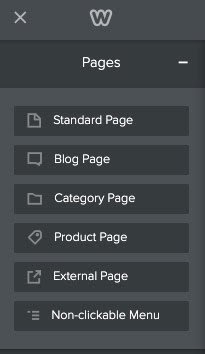
Add a new page by clicking “+” in the upper right corner of the “Pages” section. A number of page types, such as category, product, standard, blog, and external, will be available to you. Below are the options.
Customizing the Theme
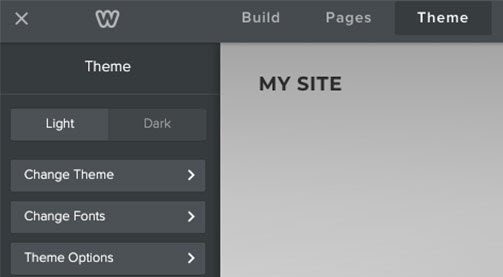
Finally, keep theme customization in mind while editing the page. You may change the fonts and theme options to customize the theme to your unique needs. You can accomplish it by selecting the “Theme” section.
Let’s move on to more advanced features and customization after going over the basics in this Weebly tutorial for beginners.
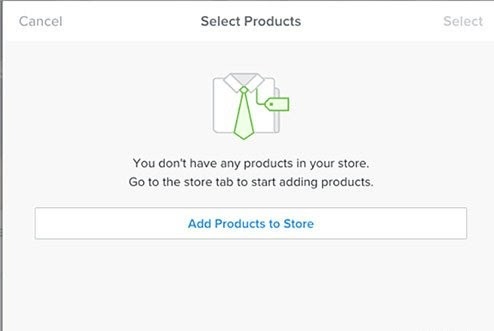
Add Products to Store
To add a new page, go to “Pages” and then “+.” On the “Product Page” page, click “Add Products to Store.”
You’ll need to upload images, choose an item type, and add a title, price, and description—all of which will display below the page’s appearance.
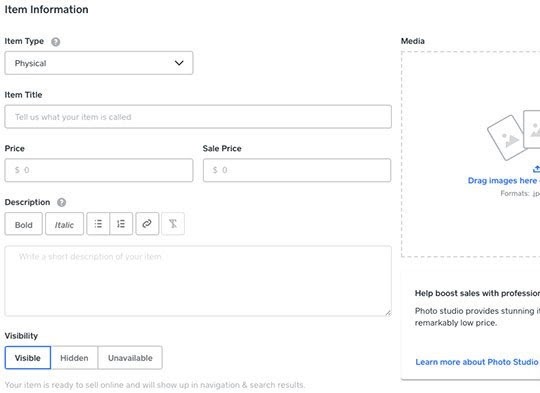
After you’ve finally filled out all of the fields, click “Save.” That’s it; your store now has a new product.
Step 5: Add Apps
It’s time to add applications to your website after you’ve personalized your theme. As you probably guessed, you need to go to the Weebly App Center by clicking “Apps” in the navigation bar. You can choose from the firm’s over 300 apps. That is just remarkable.
You may choose from a list of hand-picked applications or search for apps by category, such as eCommerce, communication, marketing, social, site, tools features. It’s important to keep in mind throughout this Weebly tutorial that not all applications are available to free users; some are only available to paid members.
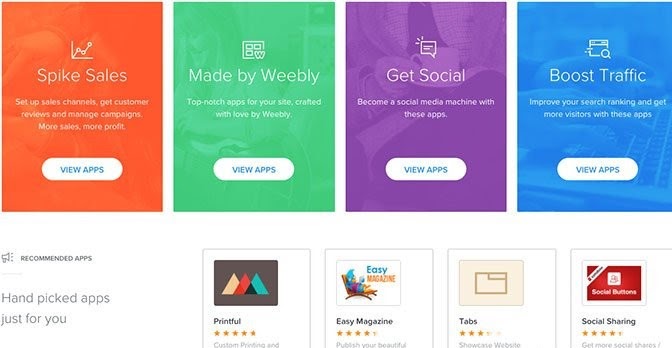
So, choose from the list of applications that may improve the functioning of your website and enjoy the benefits.
Step 6: Choose a Plan
It’s all about your personal preferences when it comes to selecting a plan. Take a look at the options:
- Free – just for the most basic of uses.
- Connect – $5/month – link your domain.
- Pro – $12/month – ideal for businesses and groups.
- Business – $25/month – for small enterprises and retail stores.
- Business Plus ($38/month) – for the full-time sellers.
Weebly’s pricing is quite customer-friendly. For those who want to build a portfolio or blog, the Pro plan is the best option. But if you want to start an online store, you will need to buy either the Business or the Business Plus plan.
You can start using Weebly for free here!
Step 7: Publish Your Website
Congratulations if you’re happy with the way your website came out – you’ve made a website! You must publish it. A single click in the upper right corner is all it takes.
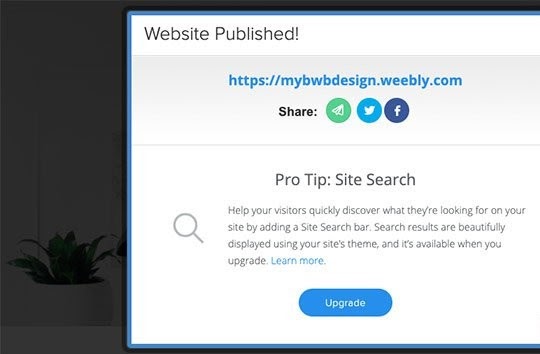
After you press “Publish,” your site will be visible to everyone on the web.
Step 8: Improve and Grow Your Website
You can do a few things once your site goes live to help it grow and succeed. Make regular tweaks, updates, and changes to maintain your site fresh and current, rather than leaving it to languish on its own.
Edit Content
Update old content, create new articles and add new sections to existing pages. Regularly updated content not only makes your site’s users happy but also shows Google that your site is active and relevant.
Optimization for Google
It’s all about using SEO to get your site to the top of Google’s search results. If you want to boost your online exposure and traffic, this is the best strategy. SEO is the only technique to get to the top of search engine results.
When it comes to SEO, various things contribute to your site’s chances of ranking high in the search results. While using headings to arrange your content is straightforward, there are several more approaches to consider.
With Weebly, you get access to a complete collection of SEO tools and beginner-friendly guides to help you get started.
Promote via Social Media
Everyone is on social media in this day and age, and you want everyone to see your website!
Pick several social media channels relevant to your business, such as Instagram for photographers and Pinterest for handmade goods. Then start adding content, such as images, blog posts, and more.
Here is our guide to the best social media management tools.
Email Marketing
You can use email marketing power. Providing new product information, news, events, deals, and discounts keeps customers coming back.
When it comes to email marketing, you can use Weebly Promote, the company’s in-house system, to build a mailing list and send customized emails. Free for two campaigns; $8 a month after that for other campaigns.
With Weebly, you can combine blog posts with email campaigns and newsletters to keep your readers up-to-date and engaged.
On top of that, you can use email marketing software to automate email marketing campaigns.
How to Use Weebly: FAQs
What is Weebly? An Introduction to Weebly
When it comes to building websites, Weebly is a popular choice. Like many of its rivals, Weebly has always put technology advancements above expensive marketing initiatives. Creating a website using Weebly is an easy process. Without having to learn a new programming language, you may develop and modify beautiful websites.
Weebly gives the domain, all of the tools, and a selection of over 100 optional templates. With HTML/CSS code, Weebly websites are customizable, and the editor allows users to construct a webpage precisely as they want it. Weebly creates websites, blogs, and online stores accessed on PCs, mobile devices, and tablets. With Weebly, you can design, build, publish, and grow your website all in one place. View and edit the website design in real-time.
How to Make a Weebly Website?
If you follow the steps in this Weebly tutorial for beginners step by step, you should have no problem creating your website. Here are the steps to follow:
- Sign up
- Select a theme
- Domain Name Registration, Selection, and Transfer
- Start editing text, adding elements, pages, background, products, etc.
- Add apps
- Select a plan
- Publish your website
- Improve and Grow Your Website
Weebly Pros
Ease of use
Every website builder claims to be the simplest to use. It is true in the case of Weebly.
Responsive Themes
Weebly’s themes are not only visually appealing, but they are also easy to use on mobile devices.
App Center
With a few simple clicks, you may enhance your site’s functionality. There are several Weebly-developed and third-party applications available.
Membership areas
Weebly allows you to restrict access to particular portions of your website to registered users. You can choose whether or not to make your registration public.
Weebly Cons
Limited Design Flexibility
To move site elements, it’s not as straightforward. It’s up to you whether or not you like the structure Weebly gives or prefer complete independence.
International Websites
Although a few third-party apps are available, Weebly blocks traffic from Russia, Ukraine, and China. It is an issue for international websites.
There is no personal restore option
If your site goes down, you must completely rely on the Weebly support team to restore it for you.
Weebly Pricing and Plans
As one of the top website builders on the market, Weebly offers a fully functional website for free. Weebly does not charge for even the most basic website, unlike many other websites.
Even their paid plans aren’t too costly. Aside from the free plan, there are four options:
- Connect
- Pro
- Business
- Business Plus
The Connect plan is $8 per month, but it goes down to $5 a month if you go for an annual subscription.
On an annual subscription, the Pro plan costs $18 per month or $12, the Business plan costs $35 per month or $25, and the Business Plus plan costs $46 per month or $38 per month. Some features are the same across, such as free SSL security, custom domains, item badges, etc.
The Business and Business Plus plans include additional features such as unlimited storage (hosting), shipping labels, and abandoned cart emails.
Weebly Alternatives
Wix

Wix is a great Weebly alternative since it is capable of handling a wide range of web design tasks.
Here’s our detailed Wix vs Weebly guide.
Further read:
Wix Tutorial: How to Use Wix to Create a Website (Step-by-Step Guide)
You can start using Wix for free here!
WordPress
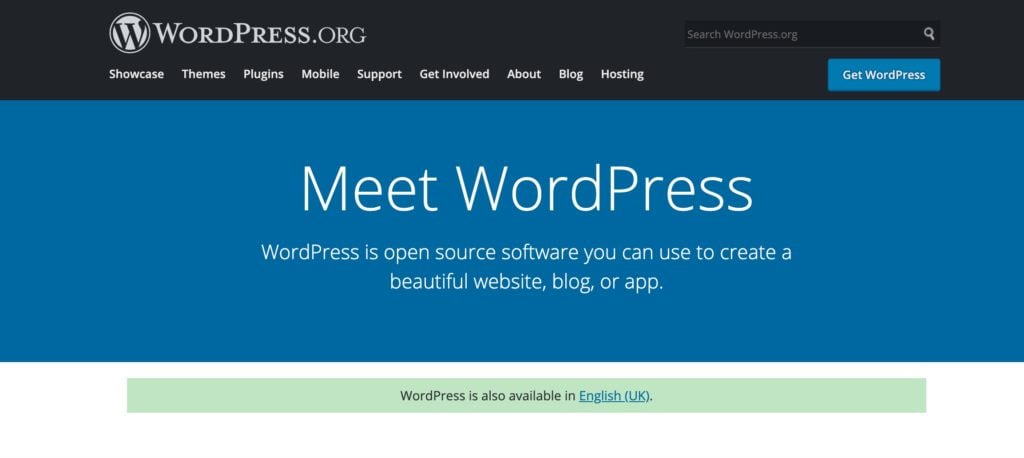
WordPress is frequently mentioned as an alternative to Weebly due to its professional appearance and simplicity of use.
Further read:
WordPress Tutorial: Building Websites with WordPress in 10 minutes
What Is WordPress? A Beginners’ Guide To Start Using WordPress
How to start a WordPress Blog on Hostgator (Step-by-Step Tutorial)
Start using WordPress with Hostgator here!
Webflow
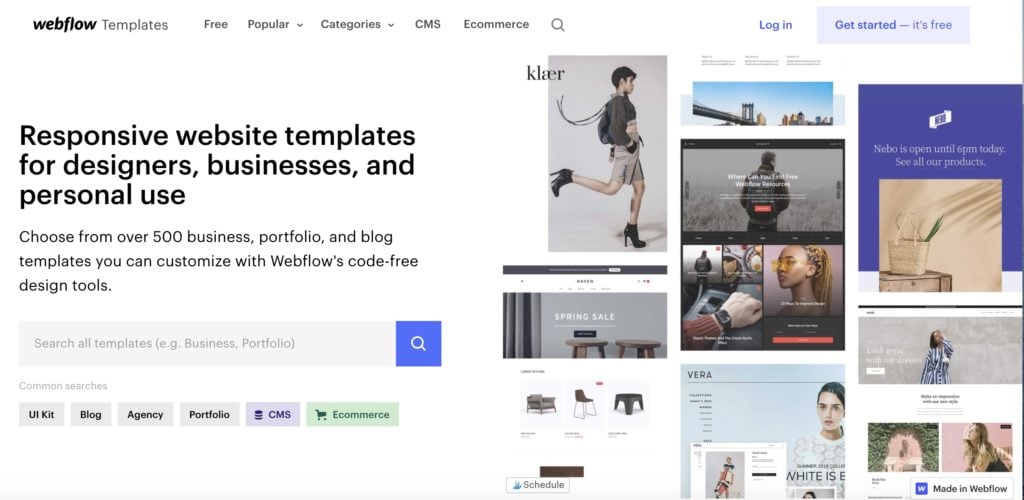
Webflow is an online website builder software created for experienced web design professionals. Both Webflow and Weebly aimed at professional web developers, although in slightly different ways.
Further read:
Webflow Pricing: Prices And Plans Explained (2022)
Start using Webflow for free here!
Weebly Tutorials: Conclusion
If you’re just getting started and want a free website builder, Weebly is a terrific option. All the widgets and apps are free, and the editor is easy to use with dozens of widgets and hundreds of other apps. With a few clicks, you might transform your site into an eCommerce platform.
The search for an affordable website builder is over with Weebly. In little time at all, because of its simple user interface and capabilities, you’ll be up and running with a fantastic website. As an added bonus, it’s free and you can do it on your own.
We hope this Weebly tutorial is beneficial and that you can use all of the information provided.
Start using Weebly for free here!
Further read:
How To Start A WordPress Blog On Hostgator (Step-By-Step Tutorial)
WordPress Tutorial: Building Websites With WordPress In 10 Minutes
Webflow Vs WordPress: Which Is A Better Website Builder?
Webflow Review: How To Use Webflow To Build Your Website With Ease?
Webflow Pricing: Prices And Plans Explained (2022)
Best Website Builder For Small Business
Wix Tutorial: How To Use Wix To Create A Website (Step-By-Step Guide)
Wix Vs Weebly: Which Is A Better Website Builder?
How To Build A Website In 5 Easy Steps (A Beginner’s Guide)
Strikingly Review: What Is Strikingly? Features, Pricing, And Alternatives
Namecheap Tutorial: How To Buy Domain From Namecheap
Bluehost Review: Is It The Best WordPress Web Hosting Provider?
Cloudways Review: Is It The Best Managed Cloud Hosting?
8 Best Blogging Platforms To Make Money (Compared And Reviewed)


